Skip to content
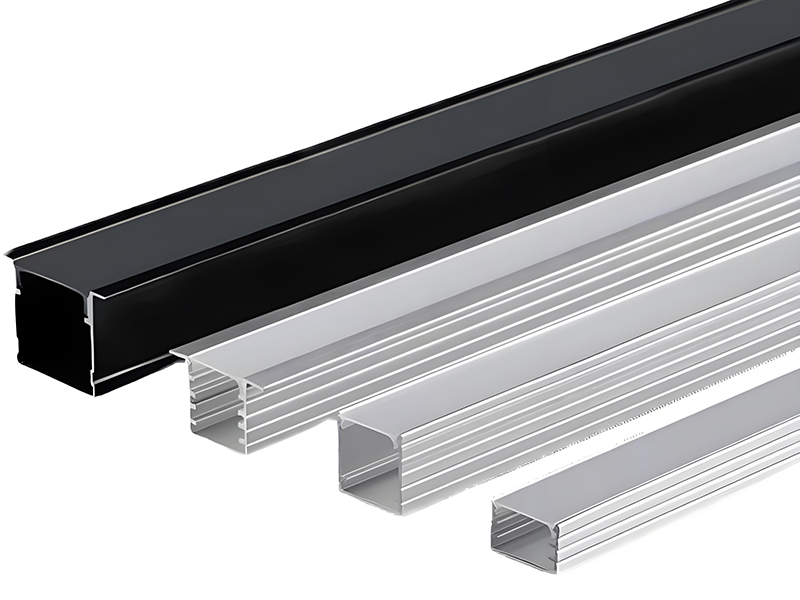
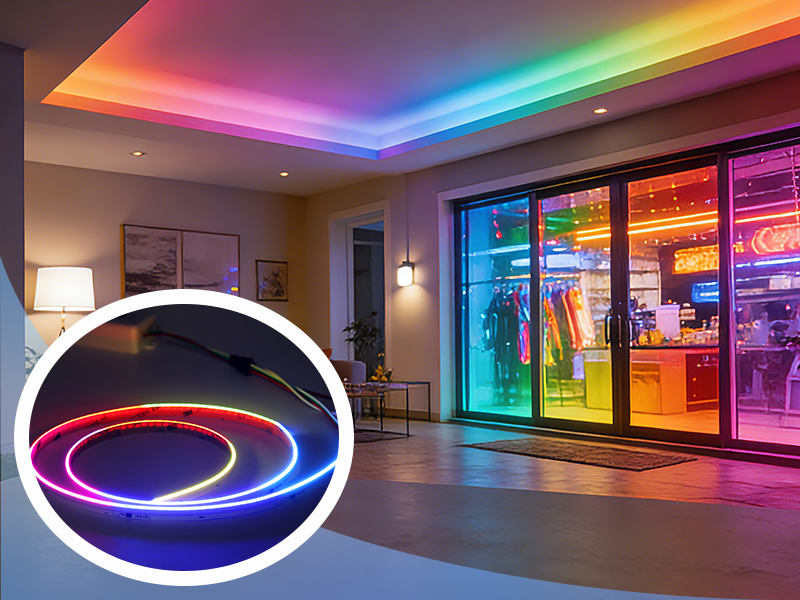
An led aluminum profile is a metal housing designed for installing and protecting LED strip lights, typically made from high-quality aluminum with excellent heat dissipation and structural strength. It not only helps extend the lifespan of the LED strip but also provides a clean and aesthetic installation while preventing glare from direct light. Often paired with a PC or acrylic diffuser cover, it delivers soft and even lighting, making it ideal for use in cabinets, ceiling coves, staircases, display cases, and other lighting applications.
2.The function and significance of installing LED strip lights in aluminum channels.
Installing LED strip lights inside led aluminum channel provides both functional and protective benefits:
1.Heat Dissipation Aluminum effectively conducts and disperses heat generated by the LED strip, preventing overheating. This helps maintain stable performance and significantly extends the lifespan of the LEDs.
2.Physical Protection The aluminum housing protects the light strip from dust, moisture, accidental impacts, and bending damage, especially during long-term use or installation in exposed areas.
3.Improved Lighting Effect
When paired with a diffuser cover, led aluminum channel help soften the light, eliminate glare, and create a more uniform and professional lighting appearance.
4.Clean and Aesthetic Installation The profile hides wires and fixes the strip neatly in place, creating a more polished and modern look suitable for cabinetry, ceilings, shelves, and architectural lighting.
5.Easy Maintenance and Replacement The profile offers a stable mounting base, making the LED strip easier to install, remove, or replace when needed.
6.Enhanced Safety By keeping electrical components enclosed and away from direct contact, aluminum channels help reduce risks associated with heat and handling.
3.Preparation stage

Preparation Steps Before Installing a cob led strip into an Aluminum Channel
1.Measure the Installation Area Confirm the length of the aluminum channel and cut the cob led strip lights to the correct size along the marked cut points.
2.Clean the Aluminum Channel
Wipe the inside of the led aluminum profile to remove dust, oil, or debris so the adhesive backing can stick firmly.
3.Check the Power Requirements
Verify the working voltage (such as 12V or 24V) and make sure the power supply matches the strip specification.
4.Prepare Wiring and Connectors Get the necessary DC wires, solderless connectors, or adapters ready for later connection to the power source.
5.Test the COB led tape in Advance Connect the strip to the power briefly to check if it lights up properly before installation.
6.Prepare Tools and Accessories Have scissors, screws, screwdrivers, end caps, mounting clips, and diffusers (if needed) ready.
7.Confirm Heat Dissipation Compatibility Ensure the aluminum channel is suitable for the strip’s width and can provide proper heat dissipation.
4.Aluminum channel preparation and fastening
When installing cob led light into led tape aluminum profile,proper preparation and secure fixing are essential to ensure heat dissipation, stability, and long-term performance.
Here are the recommended steps:
1.Clean the Aluminum Channel
Before installation,wipe the inner surface of the led strip light aluminum channel with a dry or slightly damp cloth to remove dust, oil, or debris. A clean surface improves adhesion and heat transfer.
2.Check the Channel Size and Fit Make sure the aluminum profile matches the width and thickness of the cob light. Test-fit the strip to confirm there is no bending, squeezing, or loose space.
3.Apply the LED Strip
Peel off the adhesive backing from the led cob strip and press it evenly into the channel. Begin at one end and smooth it forward to avoid air gaps.
4.Secure with Clips or Screws (If Needed) For added stability-especially in ceilings, cabinets, or long runs—use mounting brackets or clips to fix the led strip light aluminum channel in place. Screws can be used to secure the channel to the surface before inserting the strip.
5.Use End Caps and Diffuser Cover After installing the strip, attach the end caps and snap on the PC/PMMA diffuser cover. This protects the LED strip and ensures an even lighting effect.
6.Cable Routing and Connectio Plan the wire exit location and guide the power cable through the designated hole or slot before sealing the channel.
5.Steps to Install a COB led strip light into an Aluminum Channel
how to install led strip lights?
1. Prepare the Aluminum Channel Make sure the aluminum profile is clean and dry. Remove any dust, oil, or debris to ensure good adhesion.
2. Measure and Cut the LED Strip Measure the length of the aluminum channel and cut the led cob strip along the marked cut lines.
3. Remove the Adhesive Backing Peel off the protective layer from the strip’s double-sided adhesive tape.
4. Attach the LED Strip Gently press the COB lights into the aluminum channel, making sure it lies flat without bubbles or bends.
5. Connect the Power Wires Attach the strip to the power supply or connector. Ensure correct polarity and secure the connection.
6. Install the Cover/Diffuser (if applicable) Slide or snap the PC/PMMA diffuser cover onto the aluminum channel to protect the strip and soften the light.
7. Mount the Aluminum Channel Use mounting clips, brackets, screws, or strong adhesive to install the aluminum profile in the desired location.
8. Power On and Test Turn on the power to check brightness, color consistency, and proper functioning.
6. Wiring and power testing
1.Confirm Polarity
Check the positive and negative markings on the light strip and make sure they match the polarity of the power wires to avoid malfunction or damage.
2.Connect the Power Wires
Use soldering or a suitable connector to firmly connect the power wires to the strip, ensuring secure contact without loosening or short circuits.
3.Fix the Strip in Place
Place the light strip into the aluminum extrusion profiles and secure it with clips, pressure strips, or adhesive to prevent movement that may affect the wiring.
4.Power-On Testing
Connect the power supply and check whether the entire led strip light up evenly without flickering or dark sections.
5.Check for Safety Issues
Inspect the connection points for heat, looseness, or poor contact, and ensure no wires are exposed or compressed.
6.Finish Installation
After confirming everything works properly, install the cover or diffuser to complete the setup, ensuring stability, heat dissipation, and safe use.
7. Common Problems and Recommended Solutions
Common issues when installing cob led strip lights into aluminum channels mainly include size mismatch, poor heat dissipation, insecure mounting, and damage during installation. If the strip width doesn’t match the channel, it can cause bending or difficult installation—this can be avoided by confirming dimensions in advance or using compatible clips. Inadequate heat dissipation may lead to brightness decay or LED failure, so pairing the strip with aluminum channels and using thermal tape or silicone grease helps improve heat conduction. If the strip is not firmly fixed due to weak adhesive or dusty surfaces, cleaning the channel and using clips, pressure bars, or stronger adhesive can secure it better. Damage often occurs when the strip is bent or pressed too hard during installation, so it should be laid straight and handled gently. Accurate measuring, proper wiring, and attention to heat management are key to preventing and solving these issues.
8. Safety and Maintenance Recommendations
When installing cob led light strip into aluminum profiles, safety and maintenance should be prioritized. First, choose an aluminum channel that matches the strip’s size and power, and ensure the surface is smooth and clean to improve heat dissipation and reduce the risk of short circuits. Before installation, check that the power supply voltage and connectors are compatible, and use insulating tape or terminals to protect connection points and prevent exposed wires. Avoid bending, pressing, or pulling the strip forcefully during installation, and make sure it is securely fixed with proper airflow for heat dissipation. During use, keep the aluminum profile dry and free of dust, and regularly check the power wires for any looseness or damage. For cleaning or maintenance, always disconnect the power first and avoid touching electrical parts in humid or high-temperature environments to extend the service life and ensure electrical safety.
9. Application Scenario Examples
When COB strip lights are installed in LED aluminum channels, they are ideal for scenarios that require uniform linear lighting and hidden illumination. Common applications include interior lighting for cabinets, wardrobes, display cases, and wine cabinets; indirect ambient lighting in ceilings, decorative wall grooves, and architectural light coves; auxiliary lighting for stair handrails, corridors, and floor pathways; display racks, shop windows, and signage in commercial spaces; as well as background walls, mirror lighting, and recessed light slots in hotels, offices, and home interiors. Aluminum channels not only improve heat dissipation and protection but also ensure a cleaner, safer, and more aesthetically pleasing installation with a premium dot-free lighting effect.
10 . Application Scenario Examples
Installing a cob led light into an aluminum profile not only enhances heat dissipation and extends the lifespan of the strip, but also delivers softer, more uniform lighting with a cleaner overall appearance. As long as you confirm the size compatibility, clean the inside of the profile, securely fix the strip, connect the power, and test the brightness, the installation can be completed with ease. Overall, this is a lighting solution that combines aesthetics, safety, and practicality. It is ideal for spaces such as cabinets, feature walls, and display areas, providing a professional and high-end lighting experience.
11 . Conclusion
Installing a cob led strip lights into an aluminum profile not only enhances heat dissipation and extends the lifespan of the strip, but also delivers softer, more uniform lighting with a cleaner overall appearance. As long as you confirm the size compatibility, clean the inside of the profile, securely fix the strip, connect the power, and test the brightness, the installation can be completed with ease. Overall, this is a lighting solution that combines aesthetics, safety, and practicality. It is ideal for spaces such as cabinets, feature walls, and display areas, providing a professional and high-end lighting experience.